Categories
Instagram

How to boost Instagram posts from Business Manager or Facebook Ad manager

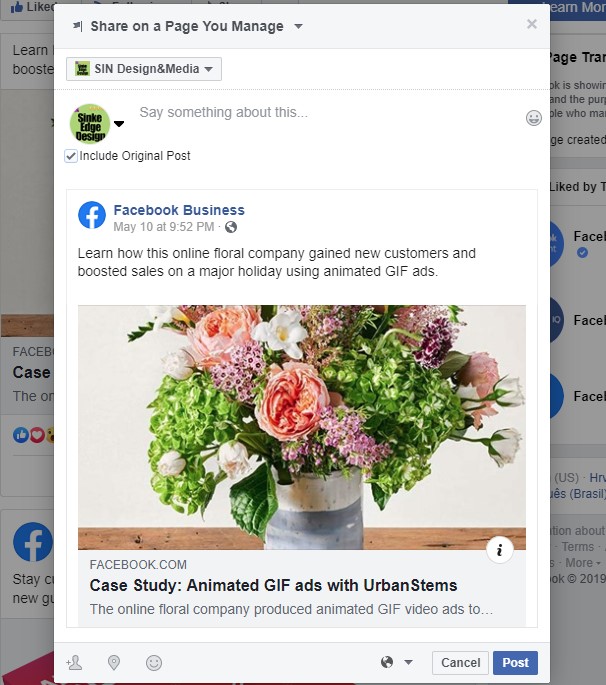
Boosting or advertising Instagram post for engagement

You want to get more engagement to your Instagram posts you will definitely want to try running ads so your posts reach more people and get more engagement, views or other actions.

Easiest way for this to be done is through your Instagram app on phone, it requires only few clicks and can be done anytime, anywhere, from your phone.

But, if you want to advertise in more profound way, you want to keep your campaigns on one place or have other people working on your ads you will definitely want to use your Business Manager and Ad account to keep things running professionally.


Promote Instagram post with Ad Manager or Business Manager

Your Business Manager is an account where you can keep all assets at one place, your Facebook pages, Instagram accounts, Ad accounts, Pixels, Catalogues, Employees and Partners.

To create an ad that will have a goal to promote Instagram post first you need to have all assets connected within your Business manager account so anyone who works for you as advertiser could promote Instagram posts without having access to Instagram account directly.

If all is connected in right way first step is to open your Ad Manager and start creating Ad


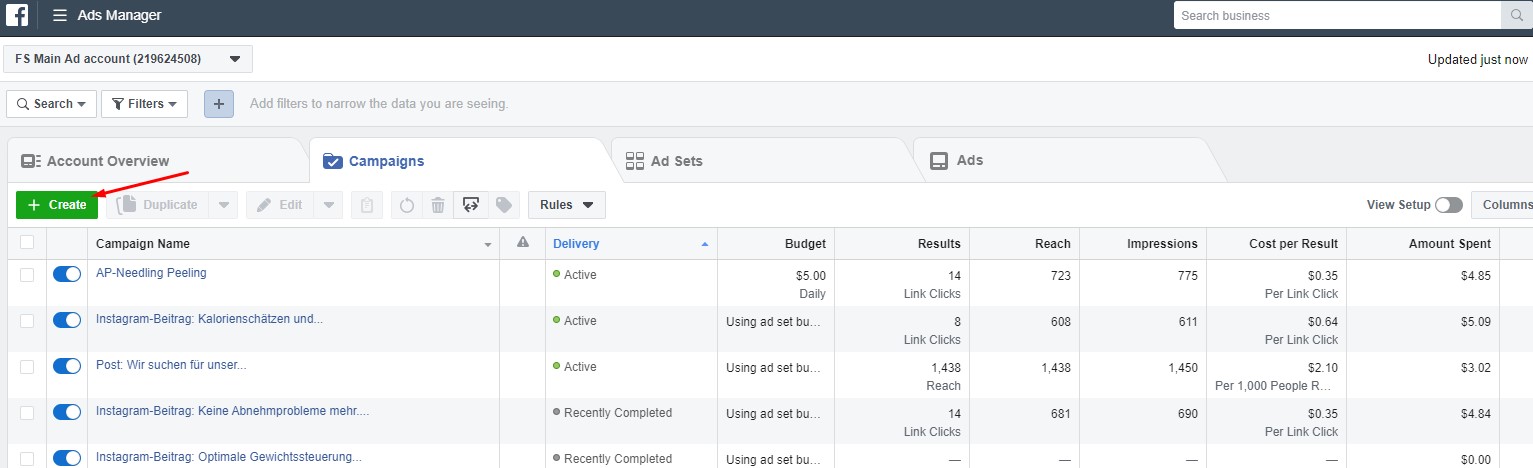
With simply clicking on Create you will start new campaign.

Next step will be selecting an Objective or a Goal we want to set our campaign for.

As we are going to promote post from Instagram we are usually selecting Engagement as objective. This means that we want to promote our post to get as much reactions as possible; likes, comments, shares, etc

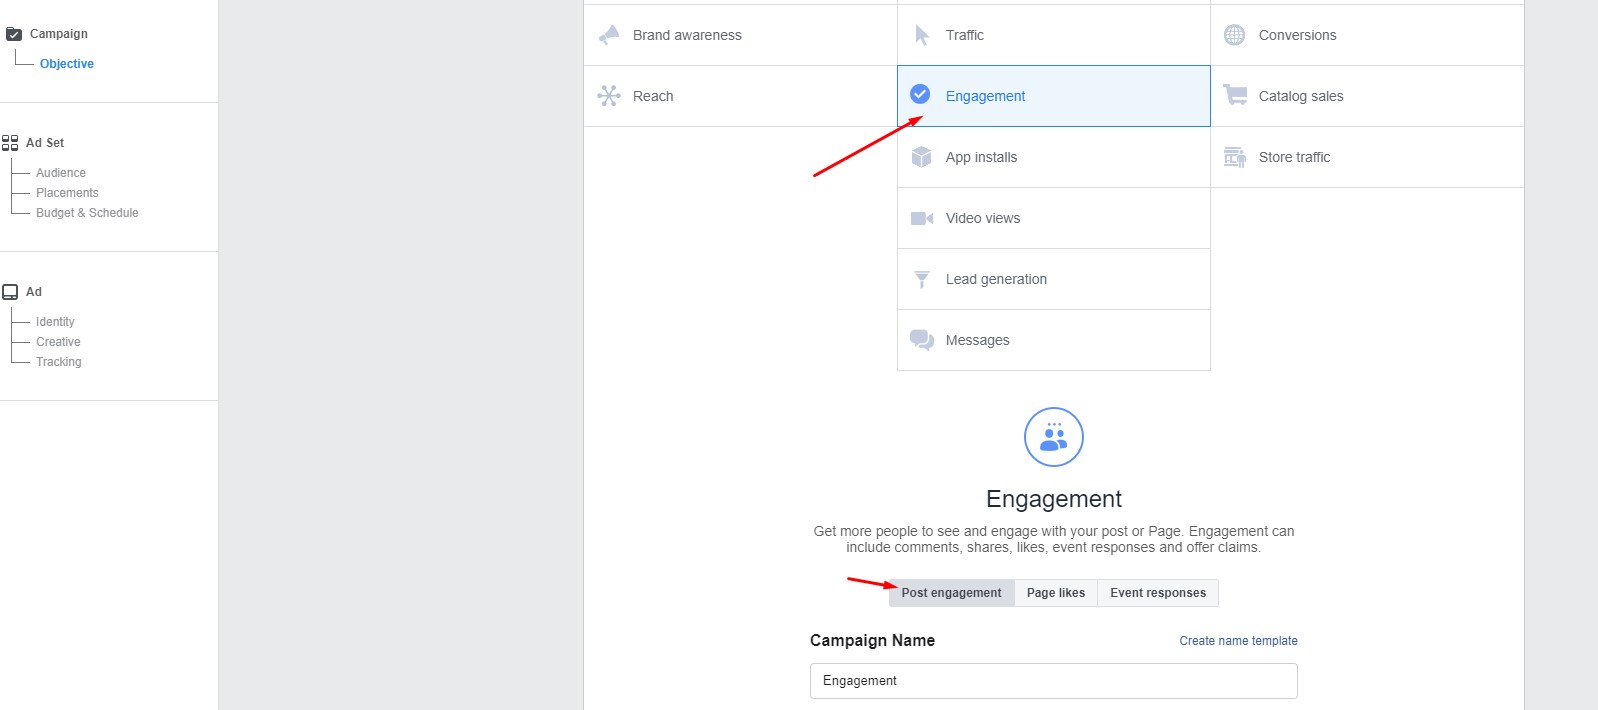
Then choose Post engagement as we are going to promote post and give a name to your campaign so you could know what was it about when you see it after few months.

Just click “Continue” to move to Ad Set lever where you will set Audience, Placements and Budget & Schedule

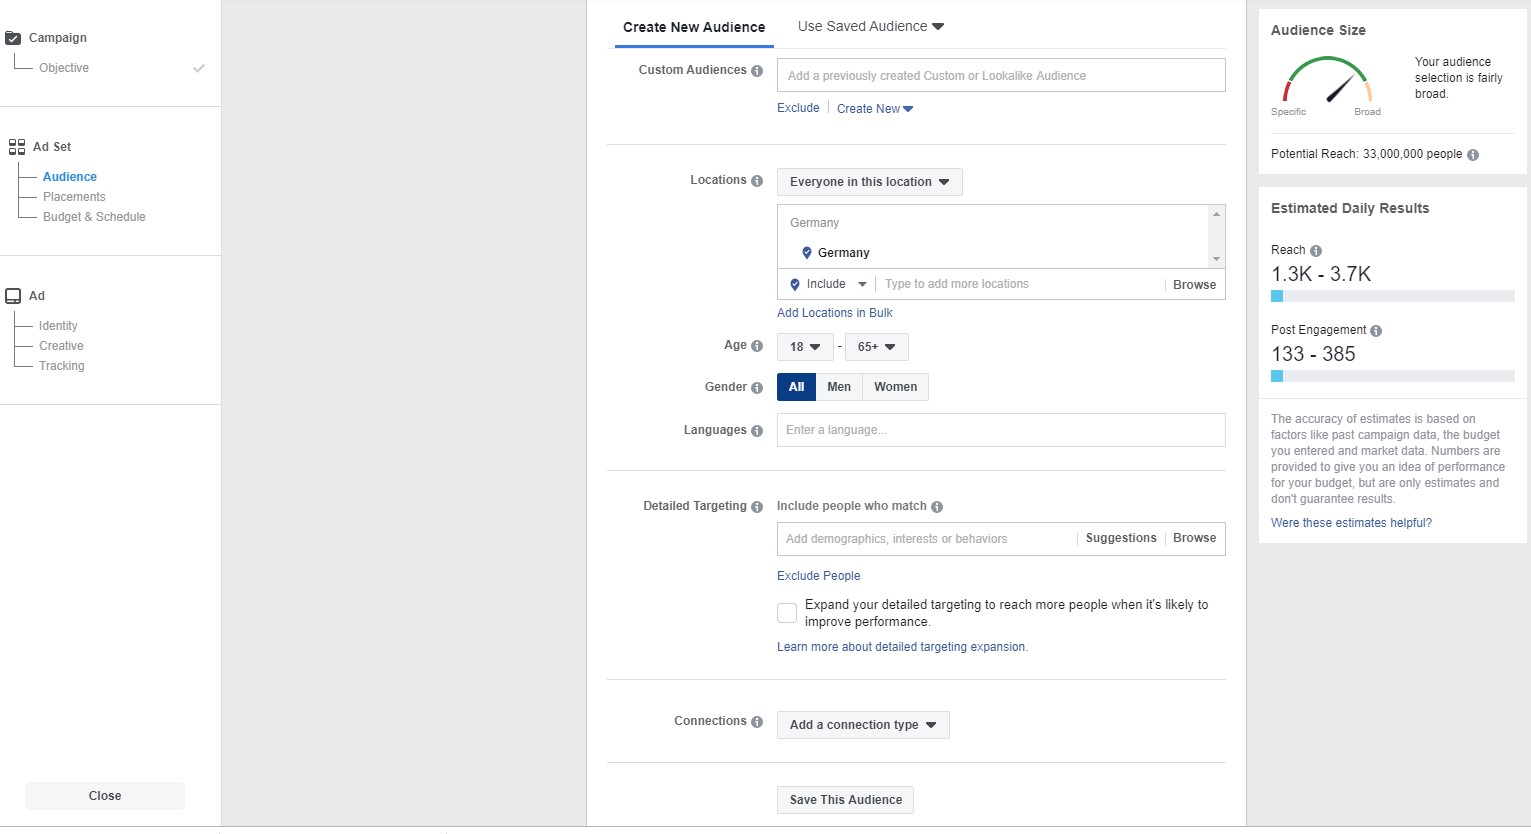
Setting audience is one of the most important factors but in this post I will skip explaining about type of audiences and what you can do with it.

So I’m moving to very important part here and that’s setting placements.

If we don’t want post to be running on all channels but maybe only on Instagram we need to manually edit placements.

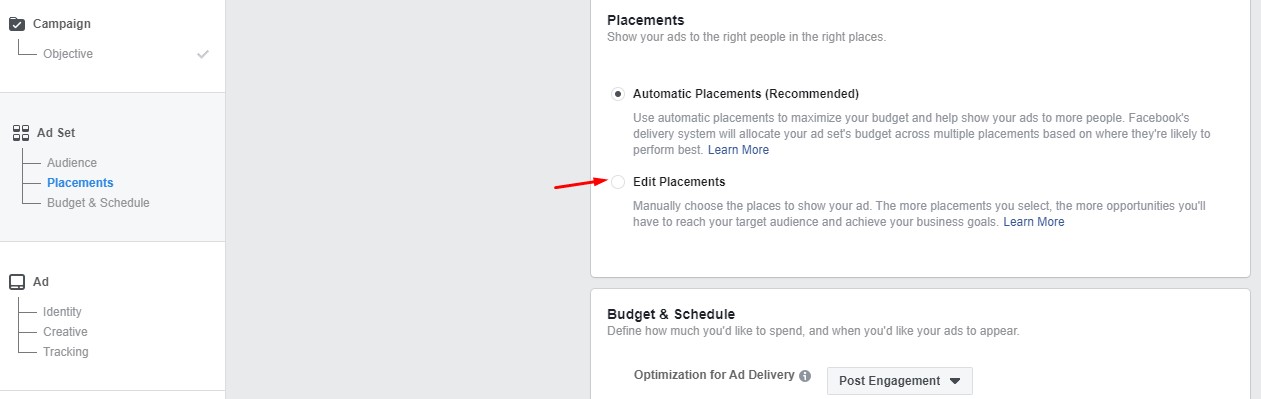
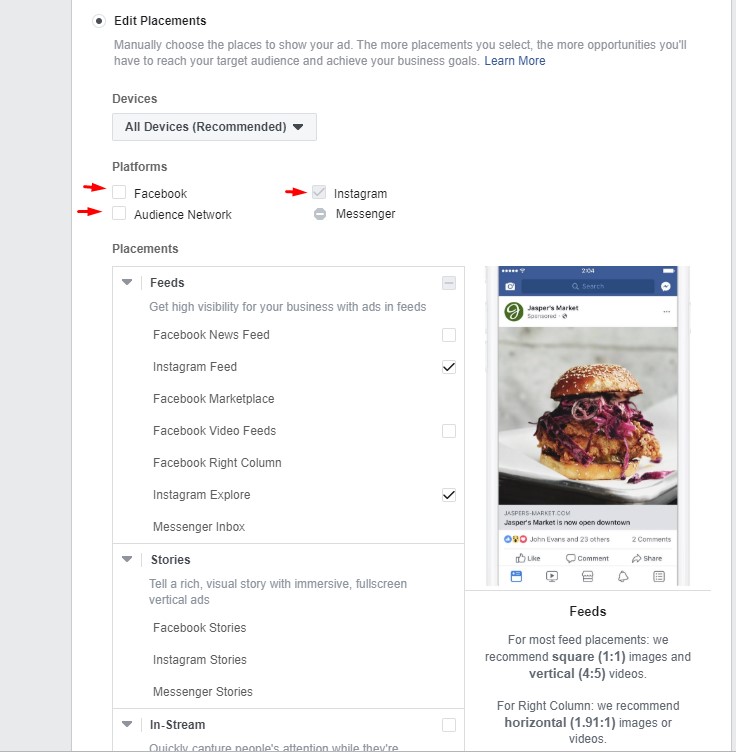
After clicking on Edit placements a window with all kind of different placements will appear. If we want to boost post only on Instagram then we need to turn off all Facebook placements and other placements that are not related to Instagram.

If we leave Facebook to show this ad and select post from Instagram then post will be showing up on Facebook feed and people could comment it, share it or like it on Facebook but that post will not be showing on Facebook page and ad will be showed like it is posted on Facebook page – there will be no connection to Instagram.

So we are turning off everything instead of Instagram placements inside Platforms section.

After this is set you still need to set your budget and then click to “Continue” button to take you to Ad lever where we will pick a post from Instagram.

Now we came to the main part – Ad level – where first section is picking Identity.

By selecting Facebook page and Instagram account we are choosing what business name will be presenting on ad people will see. Also when we pick a Facebook page and Instagram we will be able to select already existing post to promote on this page.

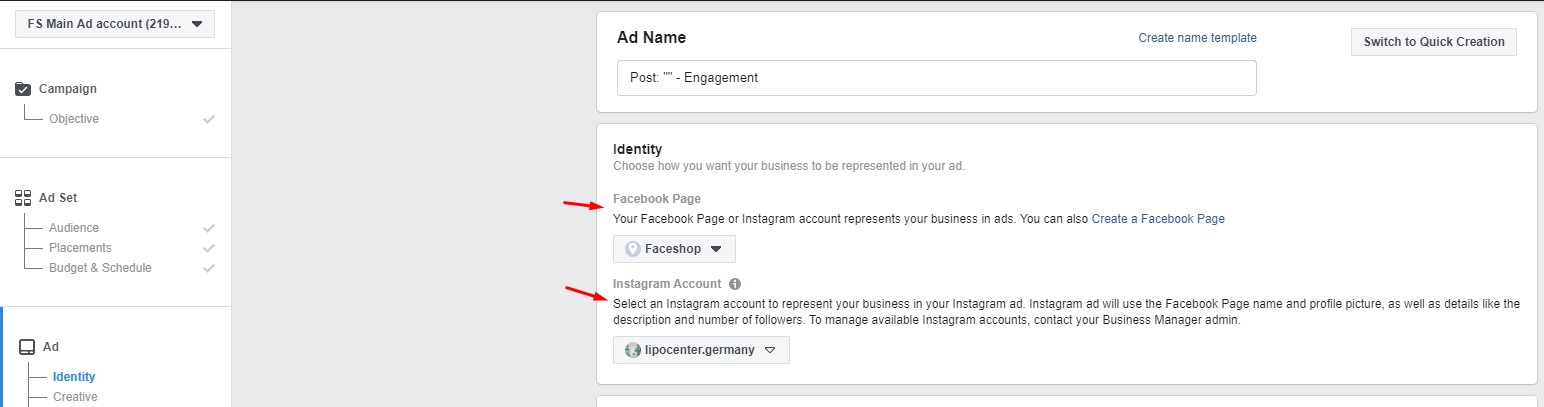
If you are only promoting Instagram post on Instagram then Facebook page is not important so just click on Instagram and select account you want to use for ad and posts.

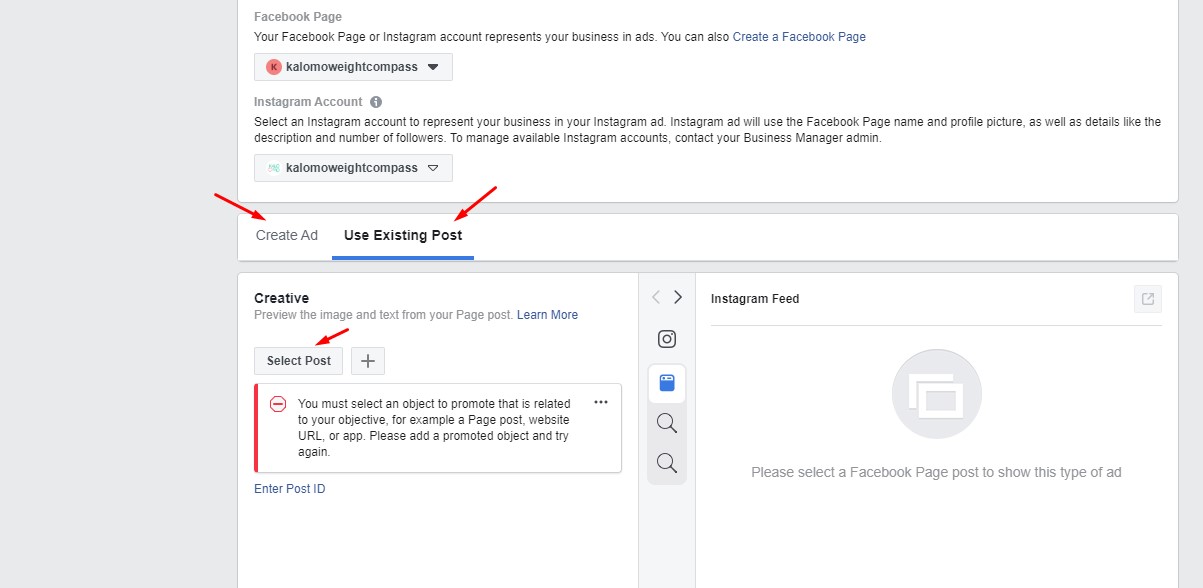
It is important to select Use existing post instead of creating new and then inside Creatives click on Select Post.

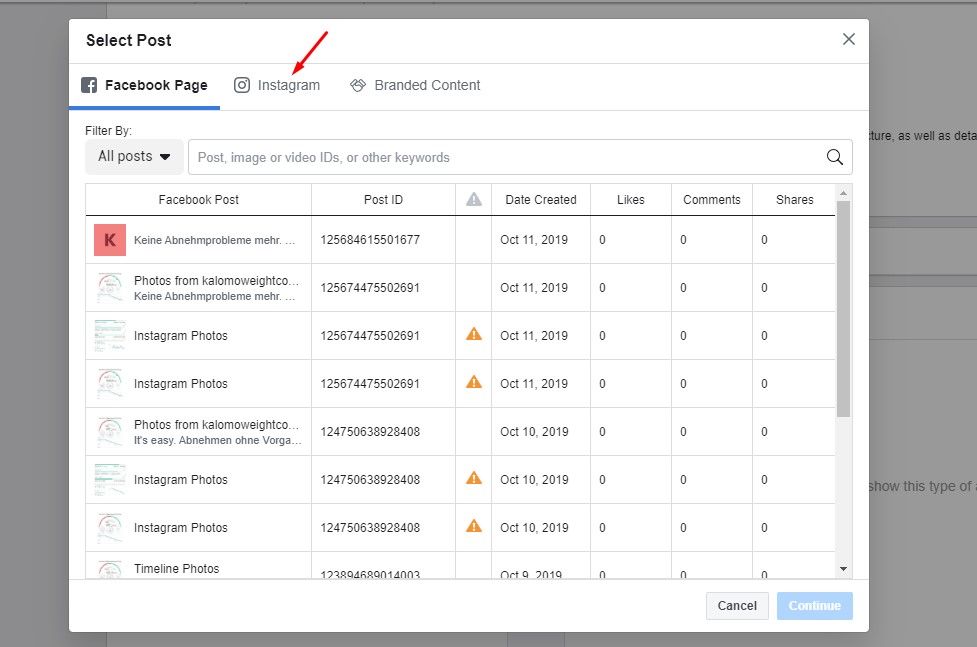
It will open a window with all posts from selected Facebook page and Instagram where you need to select Instagram as source.

When you find Instagram post just click on it and click to continue. Post will be placed in preview how will it look like and only additional setting you can choose is a button if want to use one.

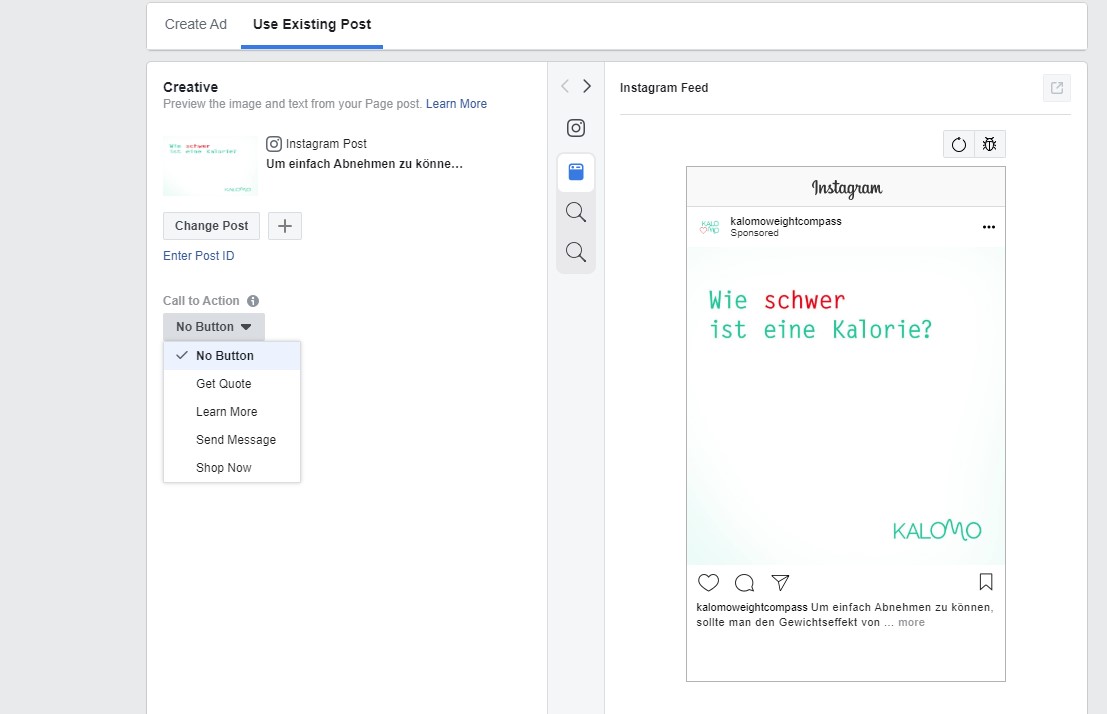
If you select any button you will need to add a link where this button lead to but I recommend not to use it.

After setting it up you can also turn on pixel for tracking (if you are using one and using link to website) and simply click Confirm to start with process of ad approval by Facebook after that ad will automatically start.

Presented example is not that good because it contains text only so it can be blocked by Facebook or simply gain very low engagement because of to much text on image.

With boosting posts this way or any other way you should be aware that it is very important to keep in mind Facebook advertising policy and not using content that is not allowed, like showing body parts, before-after images, to much text on image

To find out more about it please read Facebook ads policy https://www.facebook.com/policies/ads/

Thank you and be free to contact me for any question.


Categories
Facebook

How to share posts to my Facebook page from other pages

You have more Facebook pages and want to share post from one to another or you just want to share post from other page to your Facebook page. It is very easy to do it so just follow instructions.

Find and open a post you want to share on your page

First step is to open a page where you found a source post, go to that post and on bottom of it just click on share. After clicking on it you will find few options like sharing this post to your account, to others people timeline or to send it as message. Last option is what you need – Share to a Page.

Share post to a Facebook page
After clicking on Share to a Page new pop-up window will be opened where you will be able to select one from your pages as destination page where you want this post to be shared.
You also have option to add your own text (comment on that post) and to include original post text.

In this sample I have selected my Facebook page, placed some text and didn’t Include original post.

This is how it look when post was shared on my Facebook page

post shared on Facebook page

Now let’s see how it look when shared without adding any text to post but with including original post

And with that kind of sharing post shared on page will look like:

As you can see it looks a bit different. Main difference is that in this case original page that shared this post is presented in your post.

Sharing Facebook post to your website

If you want to present any Facebook post as part of your blog, website or landing page there is a simple option to get embed code from that post and place that code on your website.

Process also starts by finding a post you want to share and clicking on small 3 dots on top right side of the post.

share Facebook post to website

After clicking on Embed you need to copy code 

After copying that code you need to paste it on your website as part of html code. How this works depends on platform your website is built on so I’ll not show it here but generally it is simple html code that should be pasted where you want to show it.

Here is example of how I did it

I hope it helped to learn how to easily share post from one page to another and to place it on your website. If you have any question about it or would like me to explain something else please write me on my email sinkeedgedesign@gmail.com

Categories
Uncategorized

Best hosting for WordPress websites

What is a best hosting provider for WordPress website?

I’m very happy that you asked.

Why?

Because I’m a mid range user, probably like you, currently have 6 websites, 3 of them are mine and 3 managing for clients. I also have some landing pages and use emails, all websites are made with WordPress.

So, what’s the deal.

I’ve been using different hosting providers for 10 years now, some local, some big global companies like Godaddy and some online web builders like leadpages, wix and weebly.

What I found is that there is huge range of prices you can pay when you are subscribing to hosting service but most important, a price you see is usually not a real price you will pay.

Godaddy vs Bluehost experience

For example; I got a great offer from Godaddy which seemed to be very affordable hosting but that was first year discount. Next year I paid double price for hosting but also got charged for some other services I wasn’t really aware if I need them.

Finally, from $60 paid for first year I came up spending hundreds of dollars for hosting and other services probably didn’t need.

All hosting providers are companies trying to catch you on low entry price which later grows much higher.

But, price is not only thing that matters of course. You can actually find FREE hosting but really, you don’t want to do that, FREE is never FREE and you can’t get professional service for FREE.

You need hosting that will work safe, with good uptime, good customer service and good price. After my struggle with Godaddy and spending more than I should I went to dispute transactions on PayPal…but it never worked of course.

I said never again

And then I found Bluehost

It was a huge change right on start

Bluehost got their usual price at lower cost than Godaddy had on first, discounted year..not even to talk about second year.

I purchased their Plus plan and paid 3 years upfront and it cost me less then what I paid only second year on Godaddy. 3 years not worrying about paying subscriptions.

I can have unlimited websites, unlimited emails, storage and bandwidth and it was all much easier to use then it was on Godaddy.

On Godaddy I had 2 websites and needed SSL certificate for it. Hope you understand that website shouldn’t be without SSL anymore, there are so many reasons why it is a standard today and must have. Read my other blog post about it.

So, Godaddy charged me $70 for each certificate, $140 a year for both websites.

Plus, I asked their support to help me install it and they wanted to charge it to, I think it was $50. Actually whatever I asked Godaddy Support they came up with some offer (one of the reason I run away).

On Bluehost, FREE SSL for every website install automatically, customer support is much more helpful and not just that, by most relevant reviews and analytics bluehost is much better quality hosting for mid range users. See some examples.

So, nothing else to say. I’m using them for 2 years not and nothing but happy with everything. It was such a huge difference in experience between godaddy and bluehost that I’m dedicated to shout loud everywhere I can and recommend only bluehost as only hosting you’ll ever need.


If your current hosting is expiring soon just move to bluehost.

If need any help with migration from one hosting to another or need to build a website just ask me for assistance.

Categories
Uncategorized

Real Estate Video Examples

Real estate video examples